
Overview
My home lab network is of the mix and match variety. It’s whatever I can acquire free or cheap. Sometimes…not so cheap… Recently I purchased a Unifi Dream Machine Pro just to see what all the hype was about. I also couldn’t stand the noise that emanated from my Cisco ASA 5515-X. I had intentions of purchasing a Unifi switch to go along with it, but didn’t want to spend the money at this point in time. I can tell you that the UDM-P is significantly quieter and was worth the cost in that respect. With that being said, I needed to come up with a way to broadcast my SSIDs on different VLANs. I have several VLANs and SSIDS that I use for various different things. This tutorial will cover how to add an SSID on a different VLAN to your Unifi/Cisco setup. If I had gone full Ubiquiti, this would have been significantly easier than the below tutorial you’re about to read through.
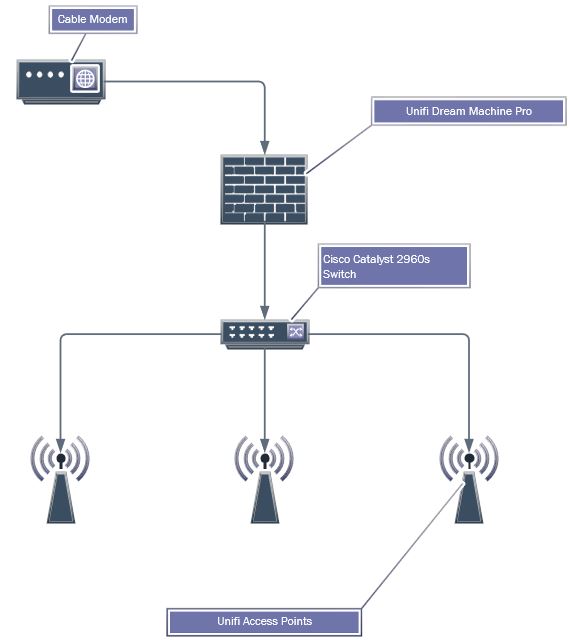
Below is what the topology of my lab network looks like. My cable modem feeds my Unifi Dream Machine Pro, which then connects to the Cisco Catalyst 2960s. My Unifi UAP-AC-Pros connect to my Cisco Catalyst 2960s.
Ubiquiti Unifi Dream Machine Pro – (Paid Link) – https://amzn.to/36OIYhA
Ubiquiti Uniti AP-AC Pro – (Paid Link) – https://amzn.to/3q05hbQ
Let’s take a look at how to add an SSID to your Ubiquiti Access Points utilizing a Cisco Switch and a Unifi Dream Machine Pro.
Cisco Side
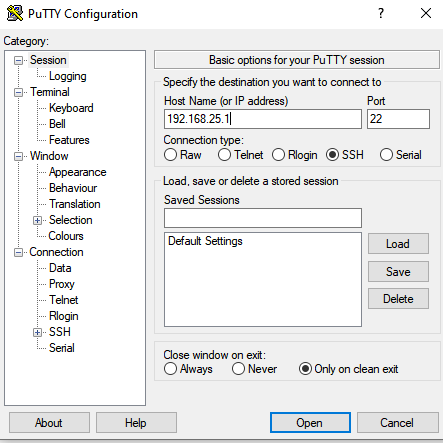
SSH into your switch with PuTTY.
Download PuTTY Here:
Open PuTTY, type in the IP of your switch. Leave the port as the default of 22. Click Open
Enter your credentials: 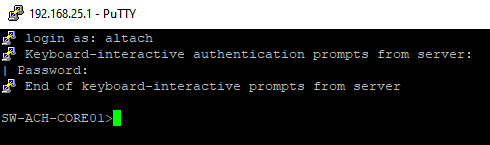
Type “Enable” or “En” and hit enter, type in your password and hit enter again 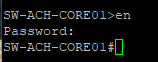
Now that we’re in, we’ll want to enter config mode to create the actual VLAN. Remember when working with most CLIs, the tab key is your friend.
Type Conf t and hit enter, this will put you into config mode. 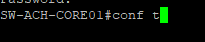

Type vlan and then a number. Let’s use vlan 99. Hit enter. This creates the VLAN on the switch. 
Type exit and hit enter. Now we need to enter the interface configuration. 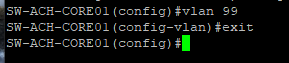
Type interface vlan 99, this is where we’ll give the VLAN an IP address, set it’s description and ip helper address. I always try to put a description on whatever I am working on, this will make it easier for you or the next technician who works on the system.

Let’s add the description. Type Description and give the VLAN a description ![]()
We need to give the VLAN an IP Address. I will typically give the VLAN a lower number IP (.1) and my Firewall a higher number IP (.254). Really, it doesn’t much matter but I like to keep some consistency on the systems I work on. In my lab, the VLAN number is the 3rd octet. Obviously you can only go so high with this IP scheme, but it works in this case.
Type the command: ip address 192.168.99.1 255.255.255.0 and hit enter 
We need to tell the VLAN where to send client to get an IP Address. I am using my Ubiquiti Unifi Dream Machine Pro to handle DHCP. So, still in VLAN99’s interface config mode, type:
Ip helper-address 192.168.25.254 (You can use the IP of your DHCP server)

Then type exit to go back to config mode. Make sure you save your config by typing: do wr
This will save the config.
While we’re here, lets configure one of the switch ports on our Cisco switch for a Ubiquiti AP. Pick a switch port that you’ll use for your Ubiquiti Access Point. For this tutorial, I’ve selected switch port 16.
Type interface gigabitEthernet 1/0/16 and hit enter. This will put you into the interface config mode for port 16 on your Cisco switch. 
Again, let’s give the port a description.
Type Description and then whatever you want to label the port as. For this, I’ll label it as Test WAP Port
Description Test WAP Port ![]()
This port will need to be configured as a trunk port as it will support multiple VLANs and SSIDs that are tied to those VLANs.
Switchport mode trunk 
We will then set the native VLAN for the trunk. In this case, VLAN 25 is my management VLAN. If you are using VLAN 1 or the default VLAN, you do not need to set this.
Switchport trunk native vlan 25 ![]()
We’re going to set the allowed VLANs on this trunk.
Switchport trunk allowed vlan 25,27,45,55,99 (the vlans that you’ll allow access to this port) 
This will set a description for your Ubiquiti Access Point, it will set the native or management VLAN for this port to 25 or whatever your management VLAN is. It’ll set the port to trunk mode and select what VLANs are allowed to pass.
You will also need to add your new VLAN to the trunk port from your UDMP to your Cisco Switch. So find the interface you are using as the uplink and add the VLAN. In this case our uplink port is 1/0/10
From config mode, enter Interface gigabitEthernet 1/0/10
Type switchport trunk allowed vlan and then enter your allowed VLANs. Hit enter.
Your uplink interface should look like this when you are done: 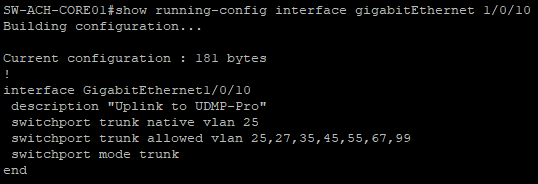
This is pretty much it on the Cisco side, let’s jump over to our UniFi Controller. At the time of this writing, I am using a Unifi Dream Machine running the 6.0.43 controller.
Ubiquiti Side
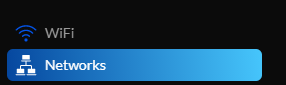
Log in to your controller (or dream machine) and go to settings

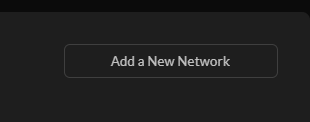
Then go to networks and click “Add a New Network”
This is where you will add the subnet of the VLAN you just created on your Cisco Switch.
Give your network a name, I like to put the VLAN# and it’s purpose. 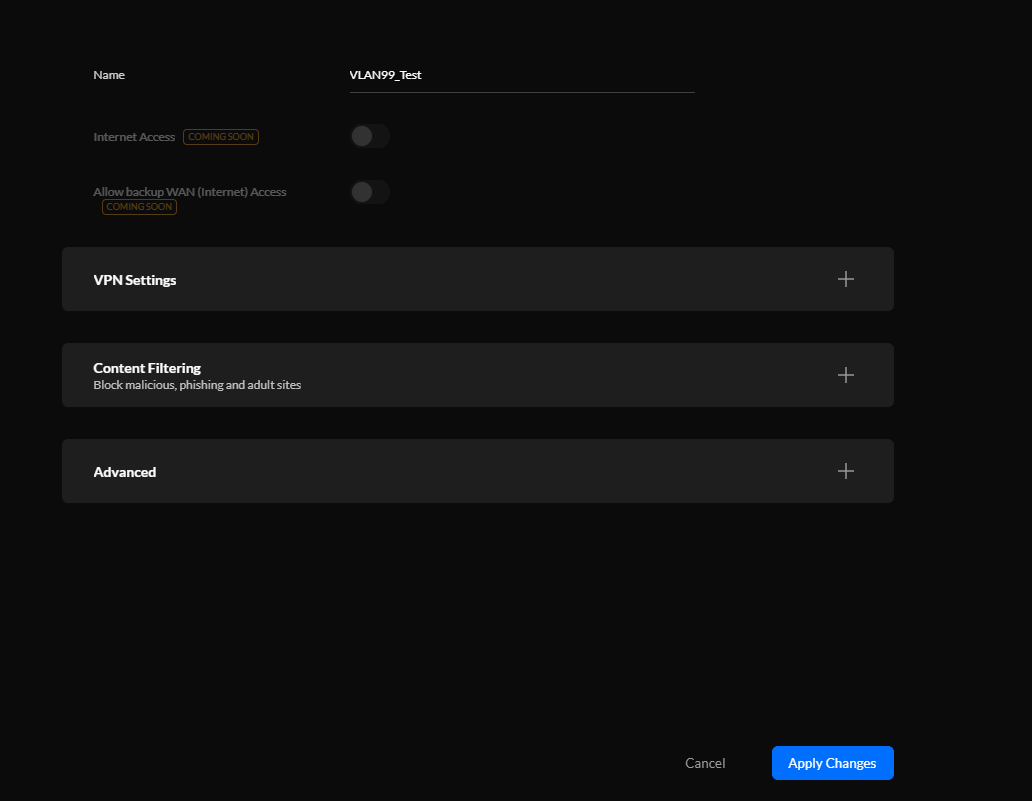
Click “Advanced” and enter the VLAN ID. 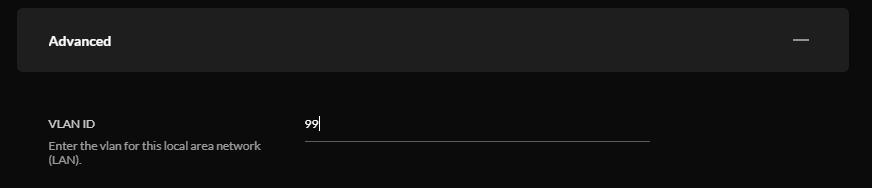
If you want to configure the DHCP pool, you’ll need to turn off the option: Auto Scale Network 
Enter your DHCP Pool settings and DNS server settings – Make sure you point the Gateway IP to your UDMP. 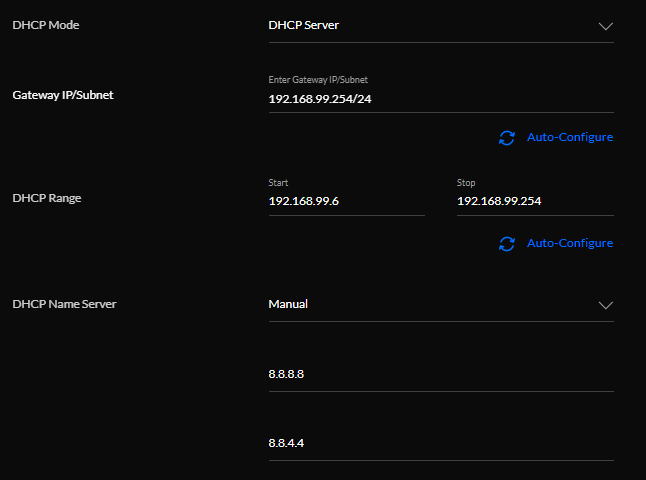
Leave the rest as default
Click “Apply Changes” at the bottom 
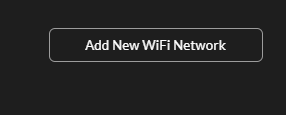
Jump up one to “WiFi”
Click “Add New WiFi Network”
Give the WiFi Network an SSID/Name, I will typically call out what it is. This is a test network, so I called it Test_VLAN99_SSID.
Set a secure password and select the network/VLAN you just created from the drop down menu.
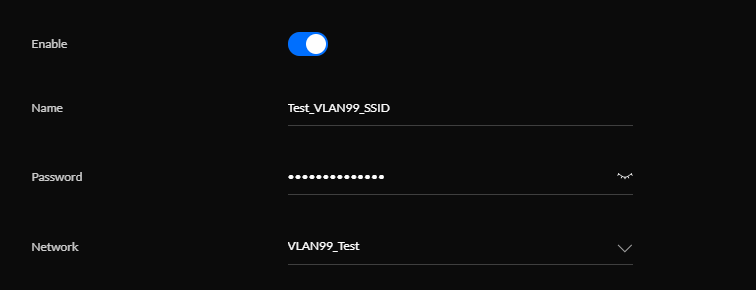
Click “Apply Changes” 
Find a wireless device and see if you can now connect to the network you just created. 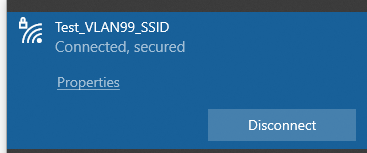
You can verify you are getting the correct IP for your new VLAN by opening a command prompt and typing: ipconfig /all 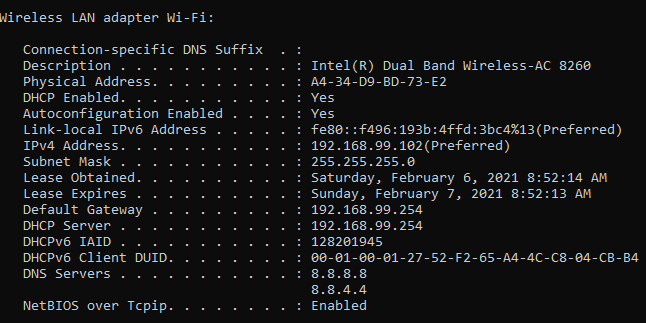
You can see we are getting the IP address 192.168.99.102.
This is how you add an SSID on a separate VLAN utilizing Ubiquiti Access Points with a Cisco Switch and a Unifi Dream Machine Pro.
Affiliated Links:
I participate in the Amazon Affiliate program, affiliate links let me earn fees by linking to Amazon.com and other affiliate links. Links will be marked as (Paid Link)