
Background
When it comes to security cameras, I have pretty much been an advocate for anything Ubiquiti. Especially when there is a budget to work with. Their cameras are fairly good quality for a decent price. Ubiquiti also includes their NVR software free of charge. I, personally, have had great success with the above mentioned software. Some hiccups here and there, but nothing major to write home about. That being said, lately I have had the desire…the want… for something more out of my home camera/NVR system that Ubiquiti does not offer at this time. A great addition to my system would be a couple of PTZs.
For those of you who do not know what a PTZ camera is, it stands for, Pan, Tilt and Zoom. This allows the user to move the camera about instead of having it in a fixed position.
In order to pull this off and add some PTZs to my network of cameras, I had to come up with a different NVR solution. This is where Blue Iris comes into play. I knew I could not replace all of my Ubiquiti cameras and really had no need to. However, I needed a solution that would play nice with them. Something else Ubiquiti is not exactly known for.
I purchased a copy of Blue Iris for $60 and installed it on my home server.
Steps to take
I then began to remove my Ubiquiti cameras from the Ubiquiti NVR software by using the “unmange” option. Once all of the cameras were out of the Ubiquiti NVR, I then logged into each camera and set them to “Standalone” mode. This allows them to send an RTSP feed. Blue Iris can then receive the RTSP feed. 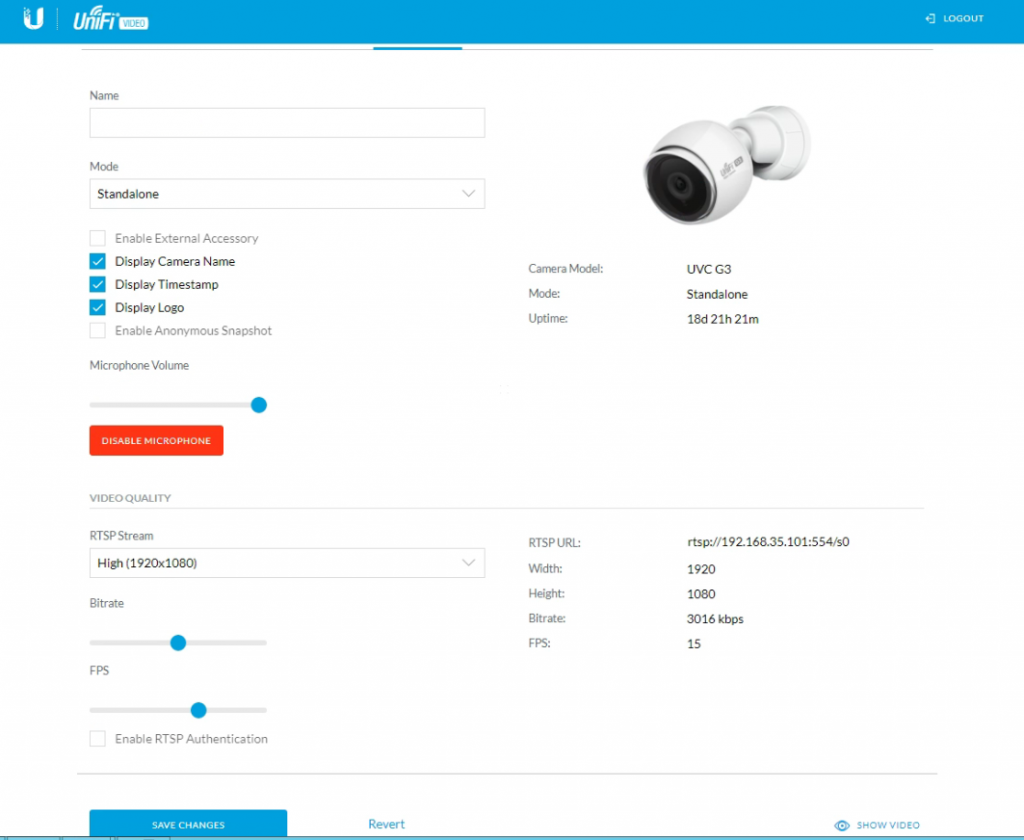
Once you have put the camera into “Standalone” mode, it will reboot.
You can now launch Blue Iris and add the camera to it. You will need your RTSP URL and port number. In this case, it is 192.168.35.101:554
Within the Blue Iris Admin Console, right click anywhere and select “Add new camera” from the popup menu.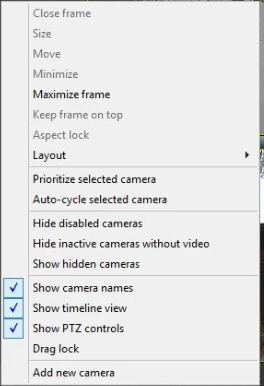
A dialogue box will appear. Give your new camera a Full Name and a Short Name.
Under “Type” make sure it is set to “Network IP”
On the “Options” section, I chose to enable all 3. These are optional, you may pick whatever options fit your situation.
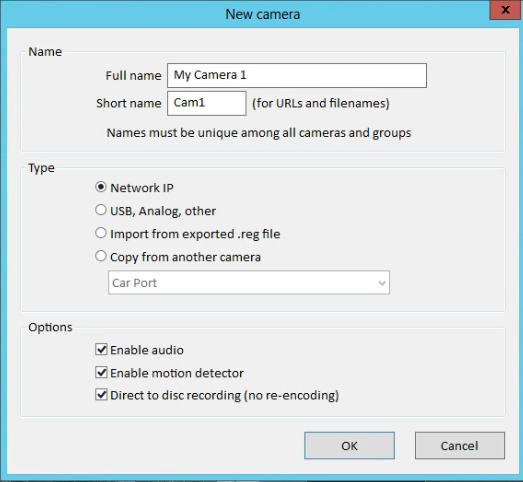
When you are satisfied with the settings, click on the “Ok” button. A new dialogue box will appear. Here you will want to leave the first drop down as “http://” and then enter the IP and port number of the camera. So in my case, 192.168.35.101:554. The “Make” will be “Generic” and the model will be “RTSP H.264/H.265/MJPG/MPEG4. Under the “Video” section, set “Path” as “/s0”, Audio Format can be set to “64kbps G.711 u-law”
I left the additional settings alone. Something I am trying to get working in the future is to require a username/password for the RTSP feed. Currently I have left those blank. From my research, Ubiquiti does not seem to support that as an option with Blue Iris at this time. I am ok with this as my cameras are on a separate VLAN on my home network.
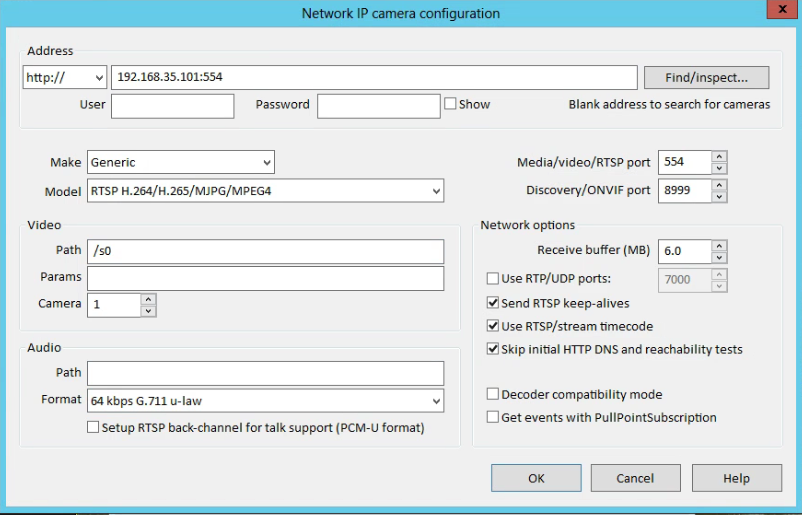
Go ahead and click “Ok” – You should now be able to see your Ubiquiti camera within Blue Iris.

Now that I have my Ubiquiti cameras working within Blue Iris, I can go ahead and any other type of camera to my system, this includes PTZs.
1 ping
[…] all of my VMs off my Hyper-V box and turn my Hyper-V box into a BlueIris/Nakivo backup box. I switched to BlueIris from Ubiquiti’s NVR recently, and although I am loving Blue Iris, I find it resource intensive. So I will be leaving it as a […]